by
by In this video learn how to enable virtualization on any PC or laptop. This is a generalized guide showing you step by step how you can find the current status of virtualization in your system and how you can open the BIOS settings and enable virtualization support in your motherboard settings.

▼Scan @ Video Index▼
- 00:00 Intro
- 01:38 Check Virtualization Status
- 03:12 Find the System or Motherboard Model
- 05:06 Google To Open BIOS
- 07:42 Google To Enable Virtualization
- 09:03 BIOS Screenshots of Different OEMs
- 11:39 Location and Name of Virtualization Settings
- 12:42 Open BIOS Settings in Windows
- 14:46 Enable Virtualization in MSI B450
- 16:39 Check Virtualization Enabled
BIOS Keys for different system Manufacturers
Here is the list of keys you may have to press to enter BIOS or UEFI:
Laptops
- Acer — Del, F2, F12, F1, Ctrl+Alt+Esc. In some cases, you may require holding the button.
- Asus — F2, Del, Esc, F10 key be pressed instead. In some cases, you may require to hold the button or press it repeatedly.
- Compaq — F10 (when the cursor is blinking on some models), F1, F2, Del.
- Dell — F2 (repeatedly), Ctrl+Alt+Enter, Del, Fn+Esc, Fn+F1.
- eMachines — Tab, Del, F2.
- EVGA — Del (repeatedly).
- Fujitsu — F2.
- Gateway — F1, F2 (repeatedly or press and hold).
- Hewlett-Packard (HP) — F1, F10, F11, F12, F2, Esc, Esc and F10 in several seconds).
- IBM — F1, F2.
- Lenovo — F1, F2, Ctrl+Alt+F3, Ctrl+Alt+Ins, Fn+F1, small button close to the power button.
- Micron (MPC Computers) — F1, F2, Del.
- NEC — F2.
- Packard Bell — F1, F2, Del.
- Samsung — F2 (in some cases repeatedly).
- Sharp — F2.
- Shuttle — F2, Del.
- Sony — F1, F2, F3.
- Toshiba — F1, Esc, F12.
Motherboards
Here we listed the possible keys according to the manufacturers.
- Delete — abit, ASUS, BFG, BIOSTAR, DFI, ECS Elitegroup, EVGA, Foxconn, GIGABYTE, JetWay, Mach Speed, MSI (Micro-Star), PCChips, SAPPHIRE, Shuttle, Soyo, Supermicro, TYAN, XFX.
- F2 — ASRock, Intel.
- Ins, F10 — Asus.
- F1 — PCChips, ECS Elitegroup
- Ctrl+Alt+Esc — Shuttle.
- F4 — TYAN.
1. Check Virtualization Status
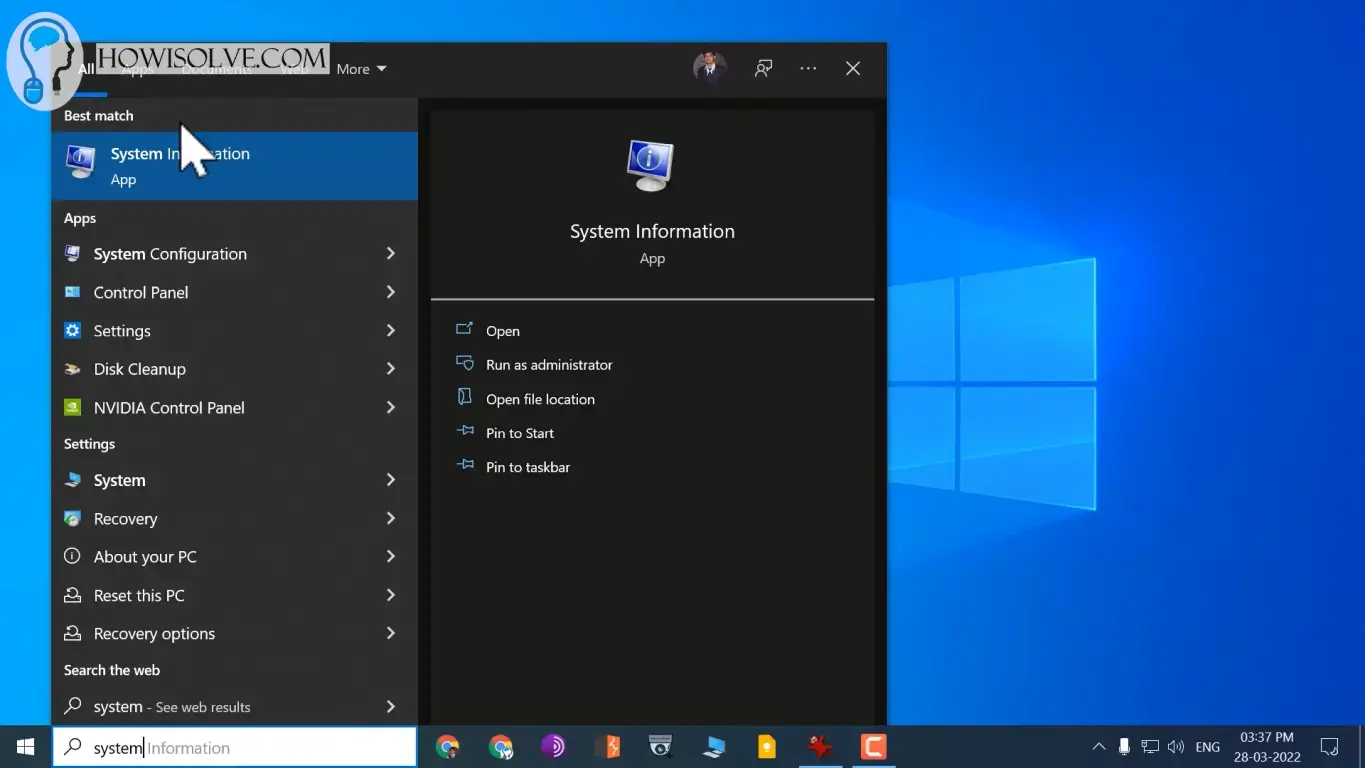
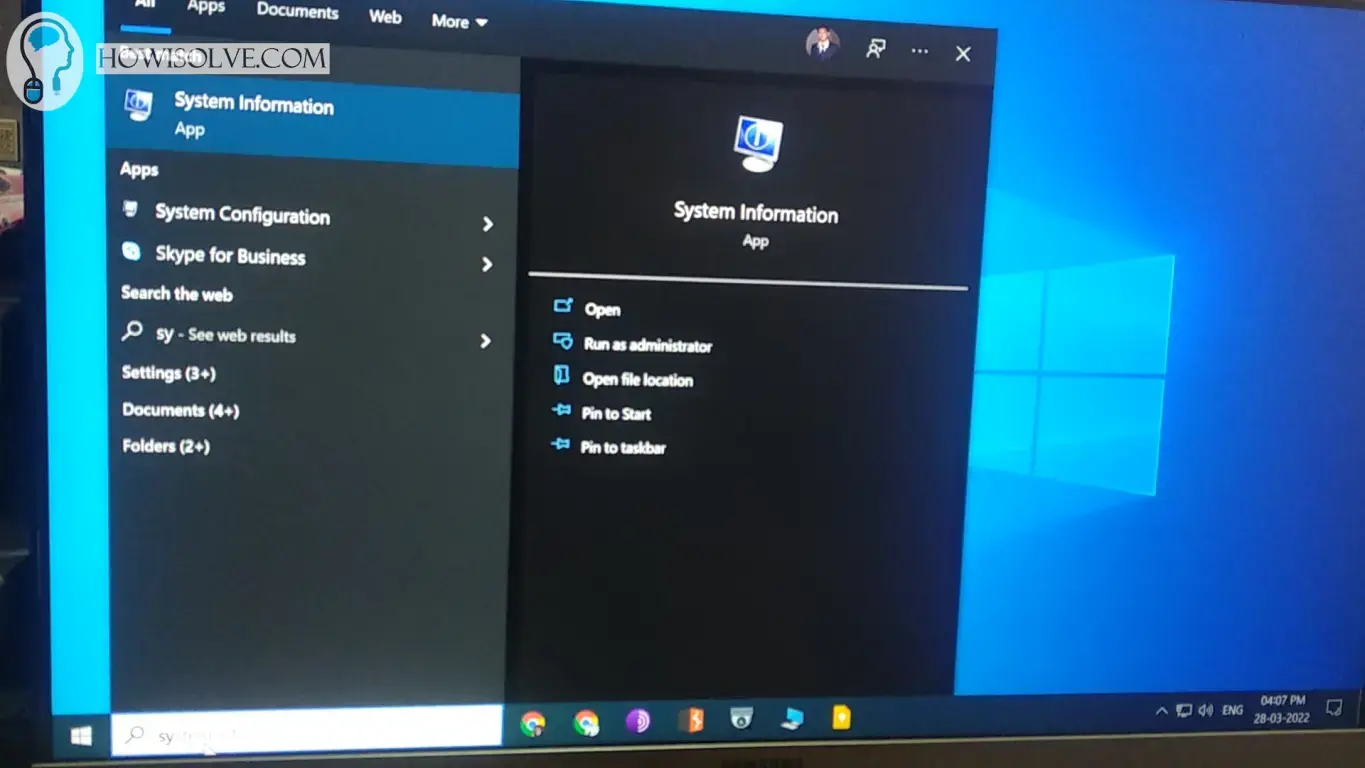
- Go to search and type System Information
- Click on the System Information App to Open It
- Scroll down to the bottom in the System Information App
- In the item, section find Hyper-V Virtualization Enabled in Firmware note its value
- If the is Yes then Virtualization is Enabled in your BIOS if No then Virtualization is Disabled.
2. Find the System or Motherboard Model
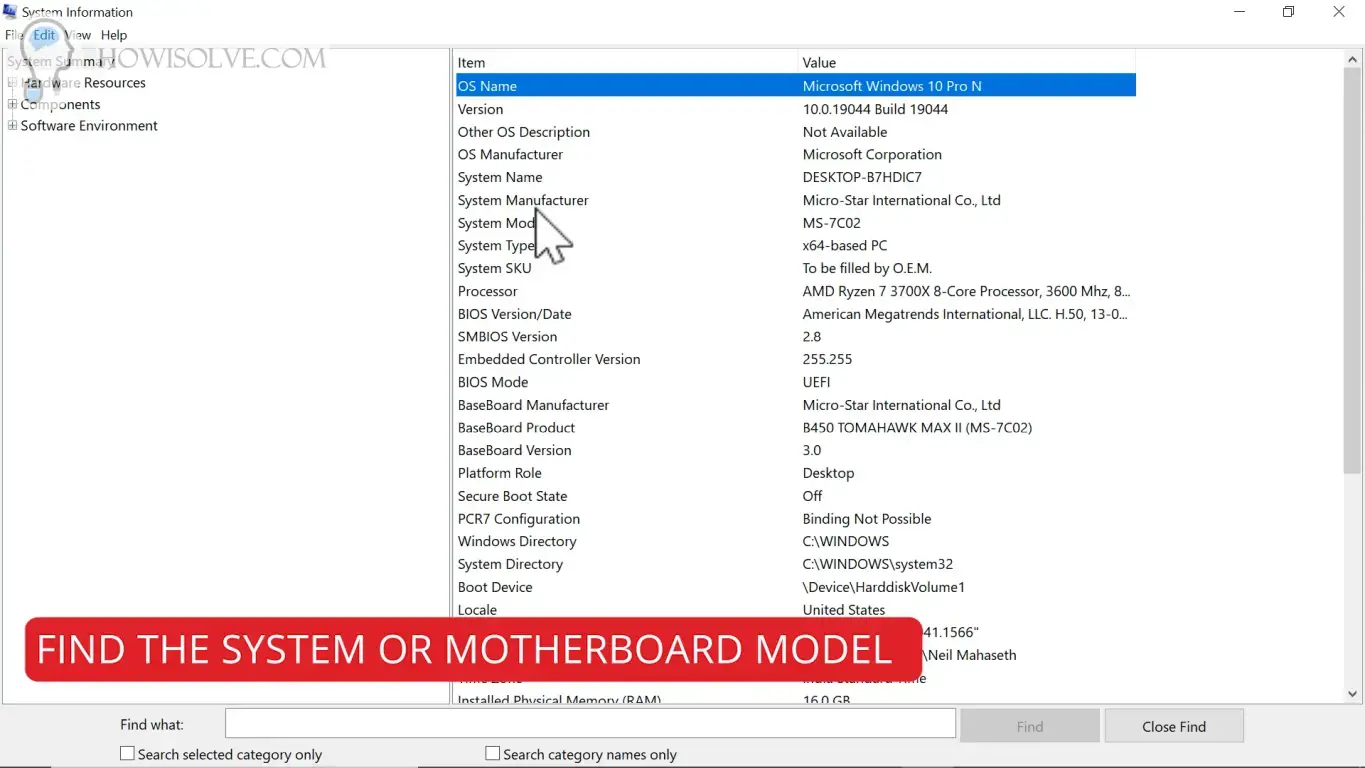
- Open the System Information app.
- In the System Information app check the value in the item System Model and System Manufacturer if you are using a laptop.
- Check the value in the item BaseBoard Product and BaseBoard Manufacturer if you are using a desktop.
3. Google To Open BIOS
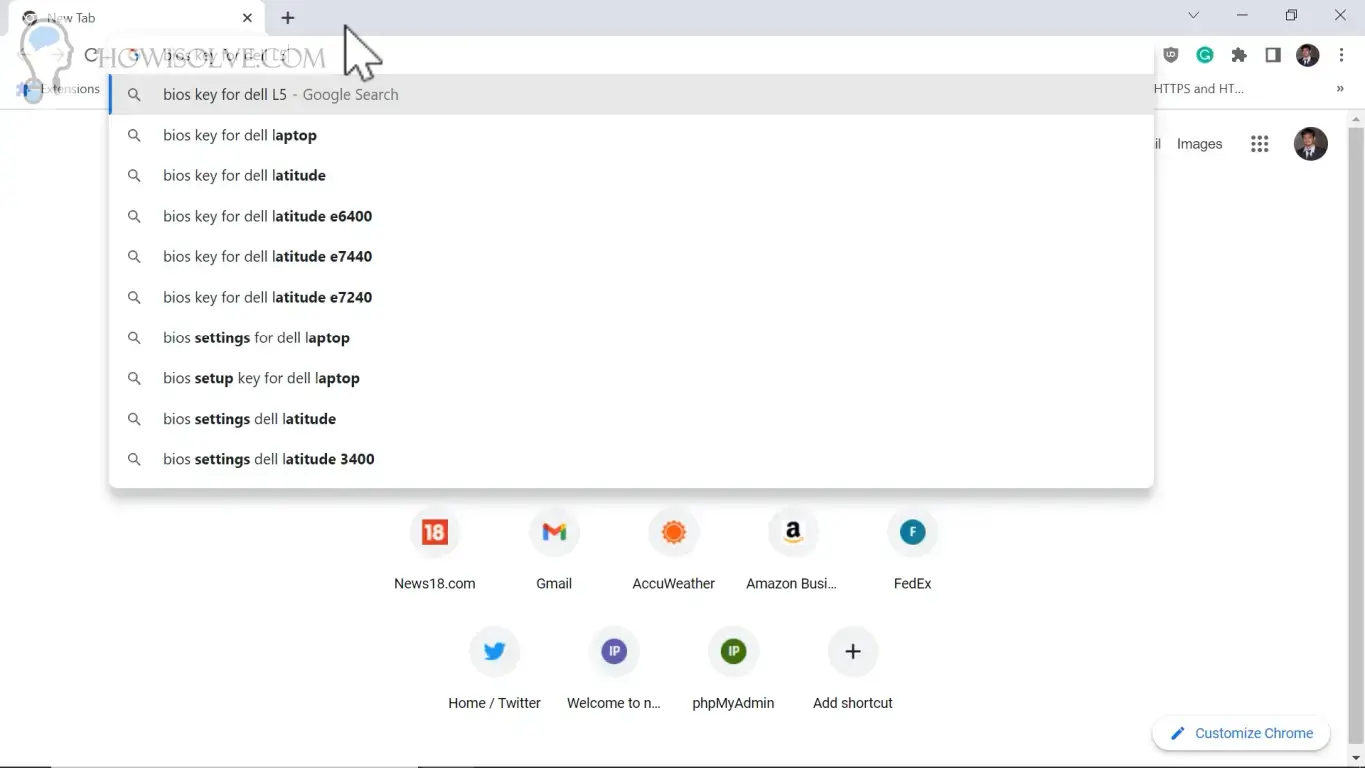
- Open a web browser and open google.com
- Search in Google bios key for [Your System or Motherboard Model ].
- For example bios key for dell XPS l502x or bios key for MSI B450 Tomahawk
4. Google To Enable Virtualization
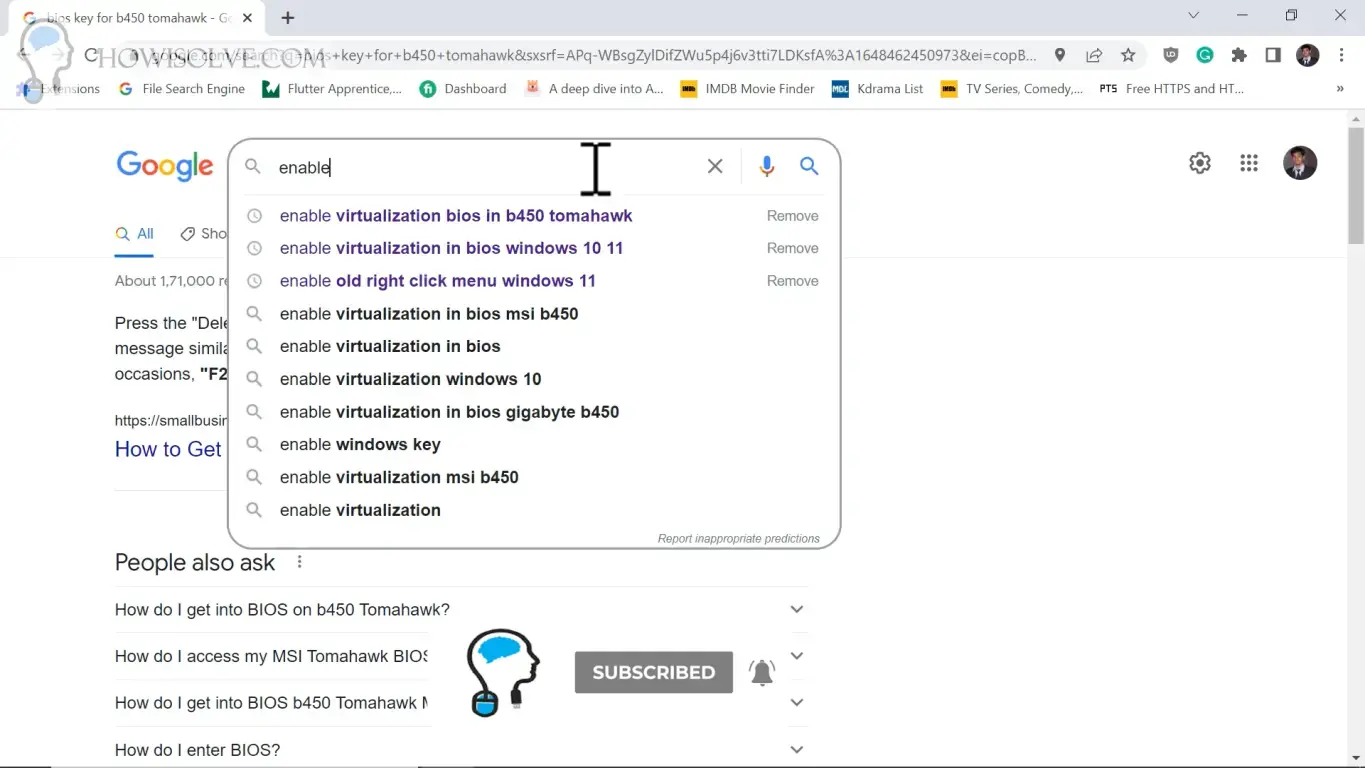
- Open a web browser and open google.com
- Search in Google enable virtualization bios in [Your System or Motherboard Model ]
- For example, enable virtualization bios in MSI B450 Tomahawk
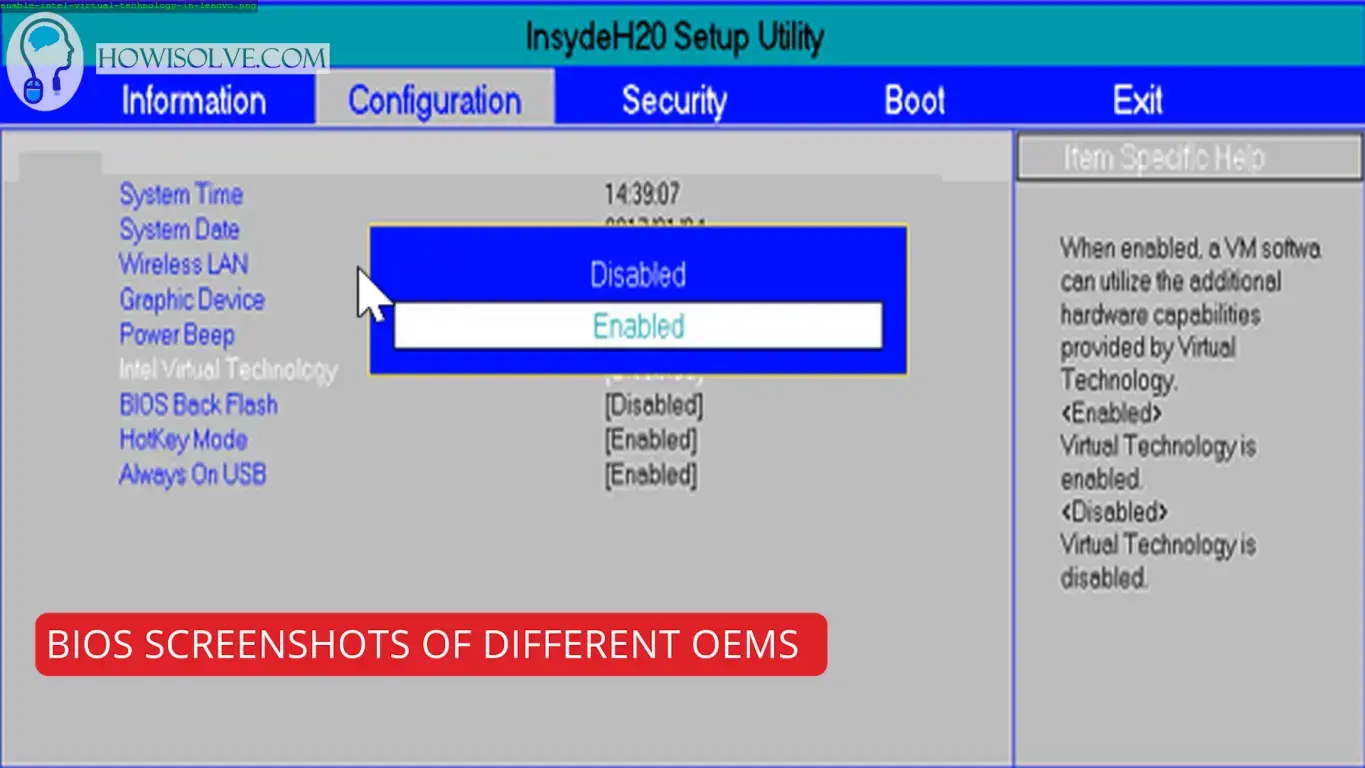
5. BIOS Screenshots of Different OEMs
6. Location and Name of Virtualization Settings
Normally the virtualization setting is present in the advanced section of the BIOS settings and under advanced it should be in the CPU or Processor Sub Section But sometimes it can be found in the overclocking or security section. The name of settings also varies depending upon the system manufacturer. The virtualization setting can be named as (intel) virtualization technology, VT-x, AMD-v, Intel-v, SVM, Vanderpool, Intel VT-d, AMDIOMMU, etc.
7. Open BIOS Settings in Windows

- Click on the Start Button
- Then click on the Power button
- After that, while pressing the shift key click on the restart button.
- This will launch the windows recovery menu click on troubleshoot.
- Then click on advanced options
- In the advanced options click on UEFI firmware Settings.
- It will ask you to confirm restart to change UEFI firmware settings click Restart.
8. Enable Virtualization in MSI B450
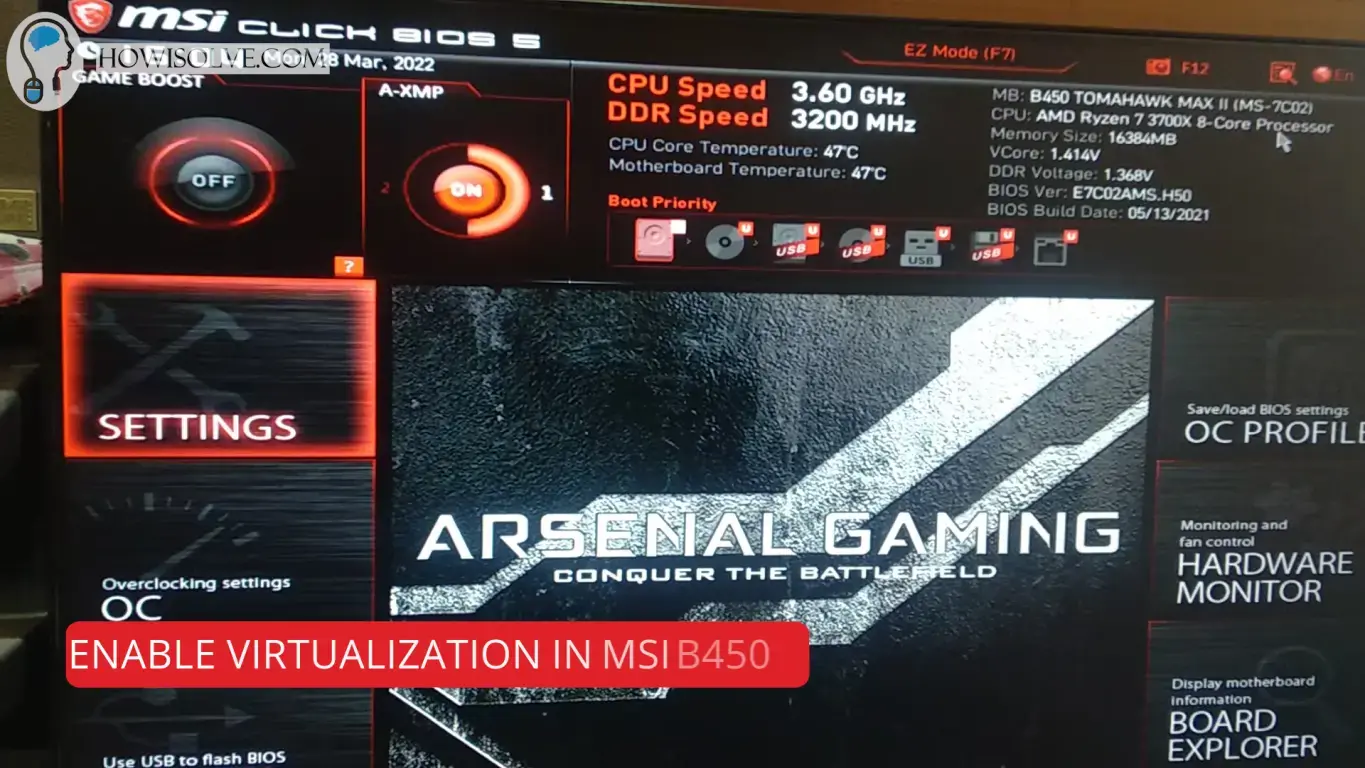
- Click on the OC button to open the overclocking selection.
- Change the OC explorer mode to expert.
- Then open Advanced CPU Configuration.
- In Advanced CPU configuration go to SVM Mode.
- Click on it and change its value to enabled.
9. Check Virtualization Enabled
- Go to search and type System Information
- Click on the System Information App to Open It
- Scroll down to the bottom in the System Information App
- In the item section, find Hyper-V Virtualization Enabled in Firmware.
- It should now have a value of Yes.
I Hope, friends you liked this detailed step-by-step guide to enabling virtualization on your PC and laptop computer. If you have some questions or are facing some issues. Post them down in the comment section will be glad to help you.
That’s all for today friends Subscribe to our YouTube channel to get more such videos in the future. Subscribe to our newsletters to get email alerts when we release new content. That is it for now friends, see you later bye.