by
by In this video, I will show you how to install android studio. We will also compile and run your first android app on an android emulator. Before installing android studio make sure to go through the system requirements. You will also need to enable virtualization in your computer to launch the android emulator. In addition, to test run android apps on a real device. You need to enable USB debugging on your android phone and install the ADB drivers in your windows systems.

▼Download @ Links▼
https://developer.android.com/studio#downloads
▼Watch @ Related Videos▼
▼Scan @ Video Index▼
- 00:00 Intro
- 01:06 Check System Requirements
- 02:41 Download Android Studio
- 03:19 Separate JDK Not Required
- 04:35 Run Android Studio Setup
- 07:05 Create a Demo Project
- 08:40 Check Virtualization Status
- 09:20 Create Android Emulator
- 11:03 Start Android Emulator
- 11:47 Run Project on Emulator
1. Check System Requirements
- 64 Bit Windows 10 or Windows 8
- 64 Bit Intel or AMD CPU
- 2nd Gen Intel Core or newer
- AMD CPU with Windows Hypervisor
- 8 GB RAM or more
- Minimum 8 GB of available disk space
- 1280 x 800 minimum screen resolution
2. Download Android Studio
Download the exe version of the android studio setup using this link https://developer.android.com/studio#downloads
3. Separate JDK Not Required
There is a misconception that you need to install Java Development Kit Separately to run the android studio. But since android studio version 2.2 and above there is no need to install JDK separately. Because Android Studio comes bundled with open JDK as mentioned in the official docs.
In some scenarios, it might be useful to install JDK separately. For example, if you have a legacy android project. Which was built using an older version of android studio and JDK. Then building it using a newer version of bundled JDK might create errors. But for normal scenarios, there is no need to install JDK separately.
4. Run Android Studio Setup
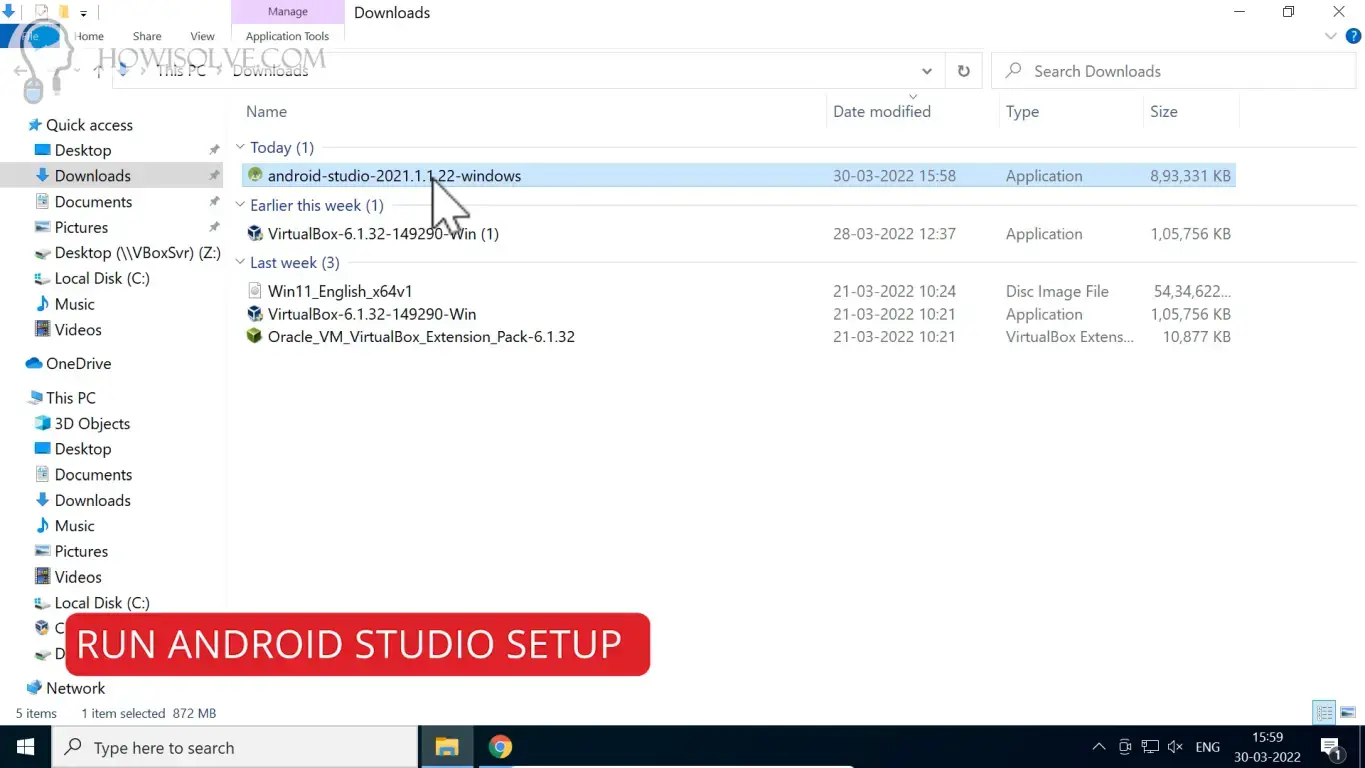
Double click the downloaded android studio exe file to start the installation wizard. Then follow the android setup wizard with the default values. This will download all the required android SDK files and install android studio on your system.
5. Configure Android Studio
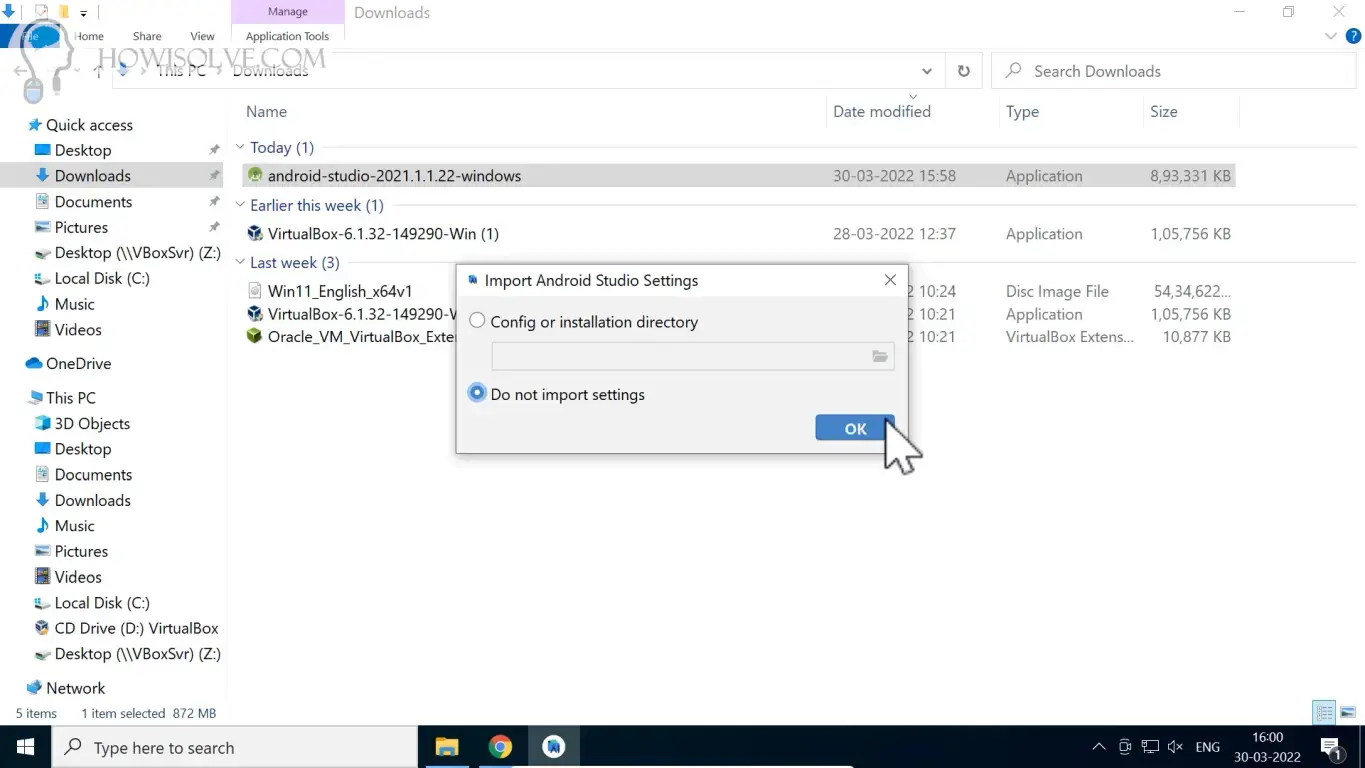
Follow the android studio setup wizard with the default values. You can select the theme depending upon your personal preference. Accept the software license agreement and grant admin writes to install the required drivers. All the components will be downloaded and set up automatically by the setup wizard.
6. Create a Demo Project
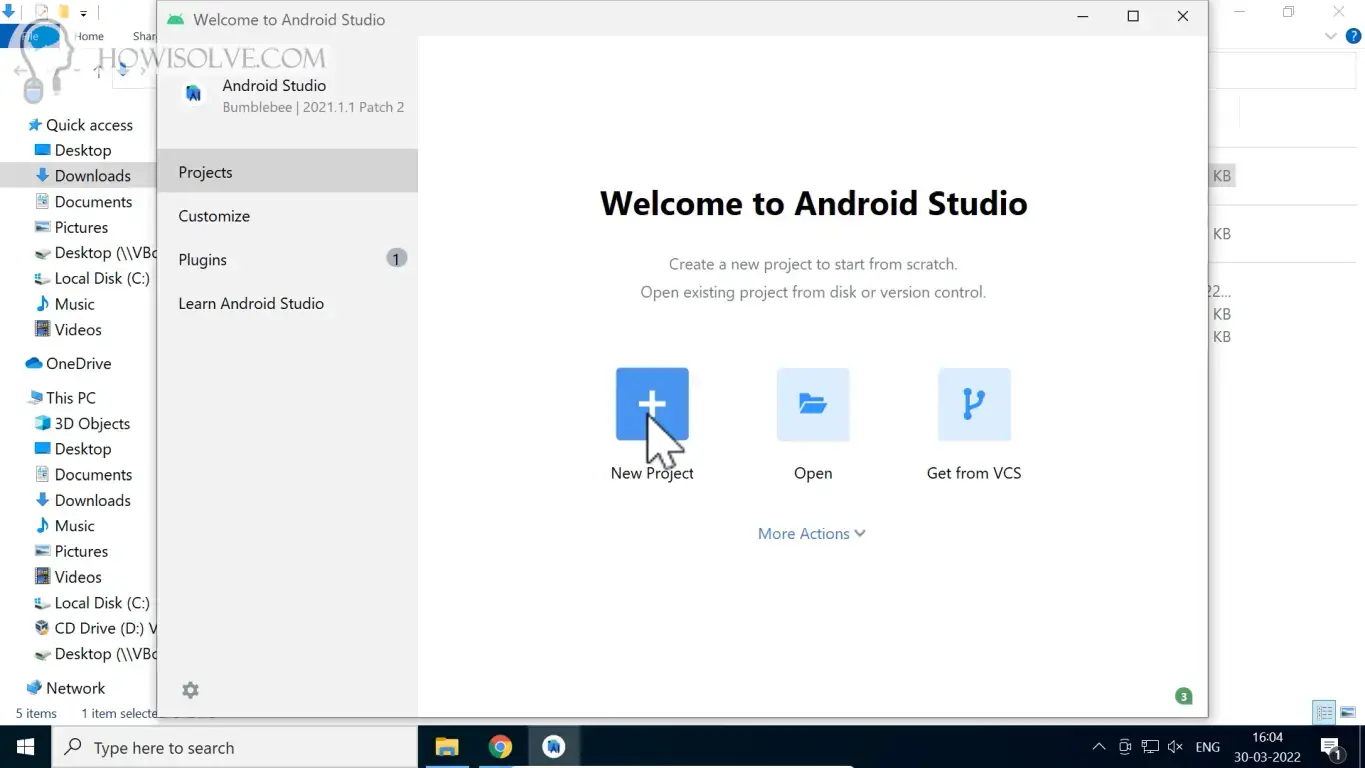
- On the welcome menu select the New Project.
- In the project type under phone and table select the basic activity and click on Next.
- In the project language, you can change it to java then click on finish.
- Grant access to add ADB to windows firewall exception.
7. Check Virtualization Status
- Right-click on the Windows taskbar at the bottom.
- Then select Task Manager from the context menu.
- In the Task Manager click on the performance tab.
- In the CPU if virtualization enabled is mentioned you are good to go.
8. Create Android Emulator
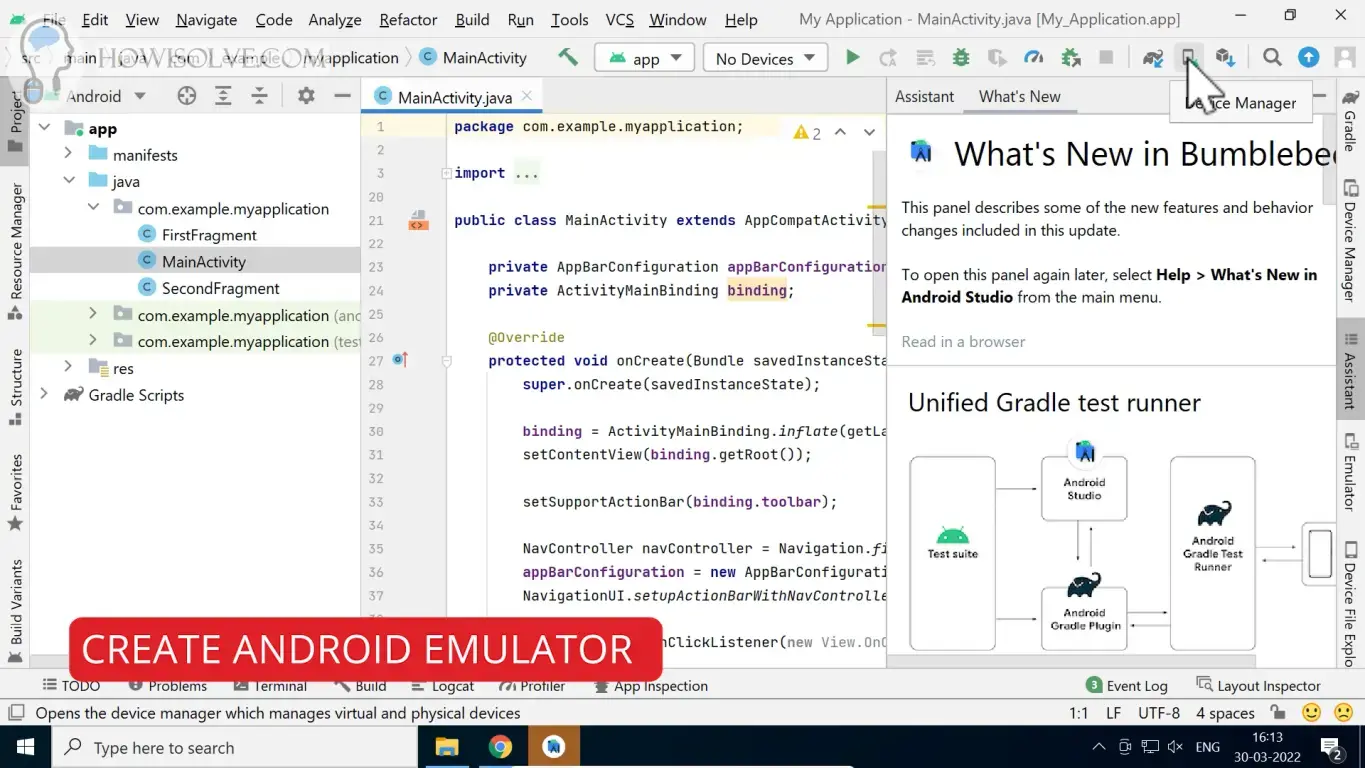
- Click the phone icon present on the toolbar to open the device manager.
- Then under the virtual devices tab, click on Create Device.
- Select the emulator device type and model number then click on next.
- Select the android version for your emulator if you have downloaded the image click on the download link next to the android version.
- After that when the download finishes click on next and give a name to your virtual android device.
- Then click on finish your android virtual device has been created.
9. Start Android Emulator
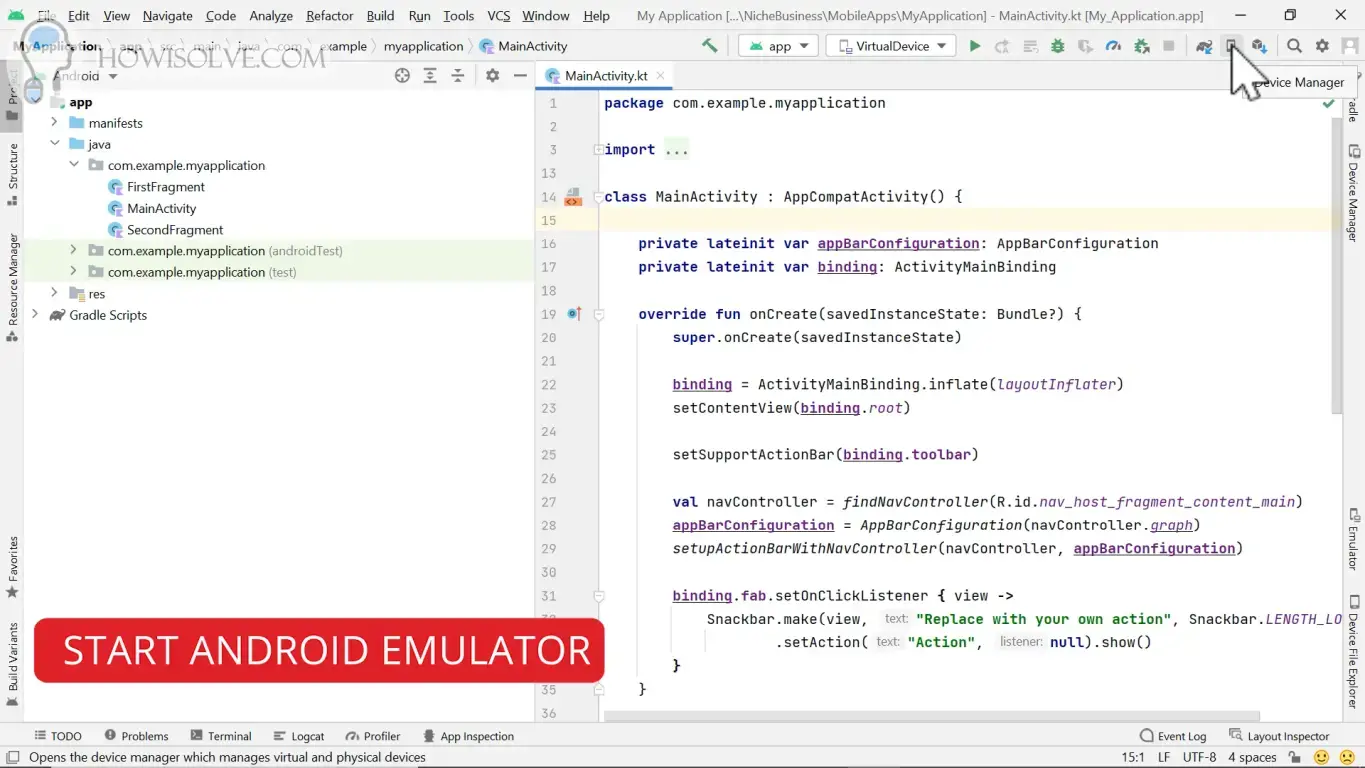
- Click the phone icon present on the toolbar to open the device manager.
- Then in the virtual device tab list installed emulators click on the play icon to start that virtual device.
- You can undock the virtual device from the side panel by right-clicking on the device tab and selecting float in view mode.
10. Run Project on Emulator
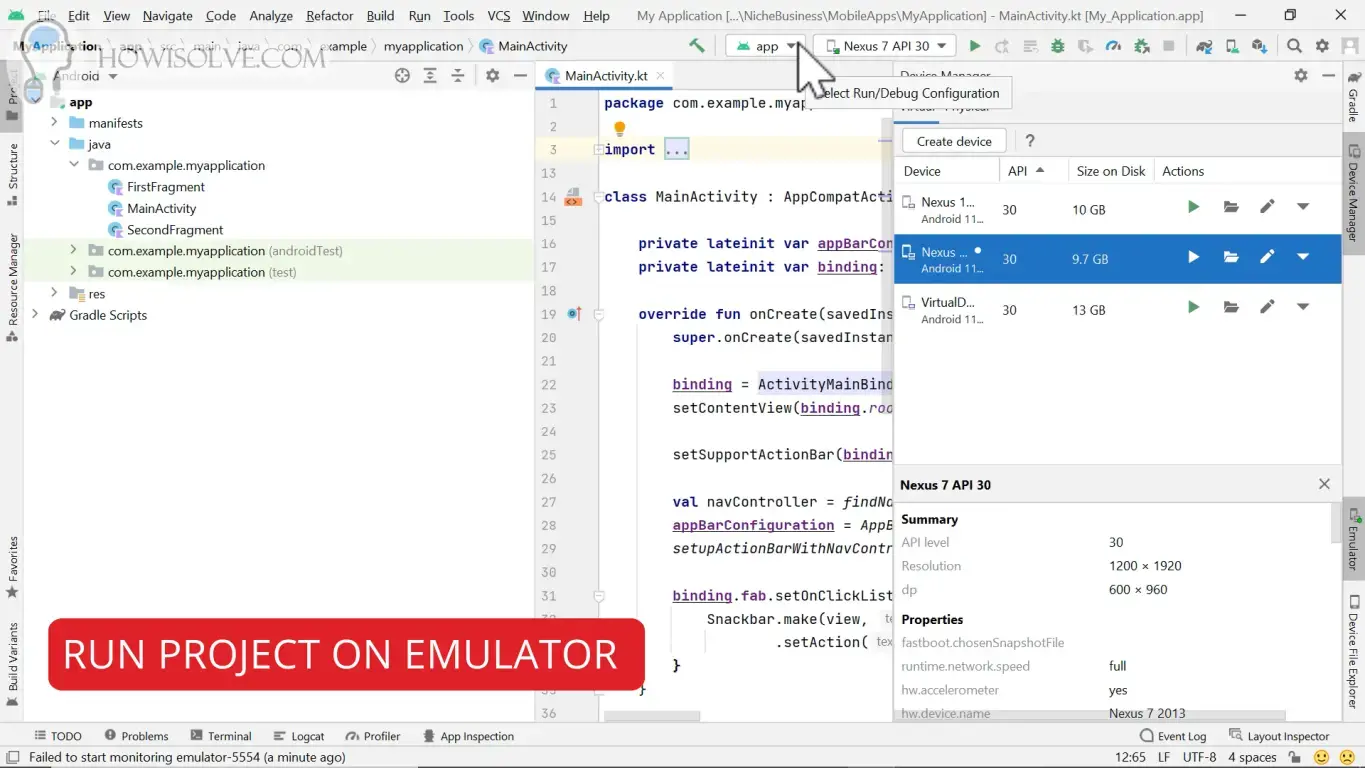
- In the toolbar select the emulator in the dropdown list of emulators.
- After that to start the build process click on the play icon next to it.
- Android studio will start building the project.
- Once the project is built android studio will generate the APK and install and run the app on the selected emulator.
I Hope, friends you found this detailed step-by-step guide on installing android studio on windows 10 helpful. If you have some questions or are facing some issues. Post them down in the comment section will be glad to help you.
That’s all for today friends Subscribe to our YouTube channel to get more such videos in the future. Subscribe to our newsletters to get email alerts when we release new content. That is it for now friends, see you later bye.