by
by Learn how to install and run WordPress locally from your computer. You can use this method on all three major OS Windows, Mac, and Linux. There can be several reasons for installing WordPress locally. You want to test a WordPress theme before uploading it to your main site. You are into WordPress development and want to test the plugin or theme locally. Or you want to learn how to use WordPress. Whatever your reason might be. Using this step-by-step guide you will see how easy it is to install WordPress locally.
▼Download @ Links▼
https://bitnami.com/stack/wordpress/installer
▼Location @ Host File▼
C:\Windows\System32\drivers\etc
▼Edit @ Host File▼
## Local Site by bitanmi - Start ##
::1 howisolve.in #Local Site
127.0.0.1 howisolve.in #Local Site
::1 www.howisolve.in #Local Site
127.0.0.1 www.howisolve.in #Local Site
## Local Site by bitanmi - End ##
▼Scan @ Video Index▼
- 00:00 Intro
- 01:17 Download Bitnami WordPress
- 03:00 Install Bitnami WordPress
- 05:24 WordPress Server Manager
- 05:52 Open WordPress Site
- 06:23 Add Custom Domain
- 09:13 Open WordPress Dashboard
Download Bitnami WordPress
Using the https://bitnami.com/stack/wordpress/installer download the Bitnami WordPress stack. It supports Mac Os, Windows, and Linux.
Install Bitnami WordPress
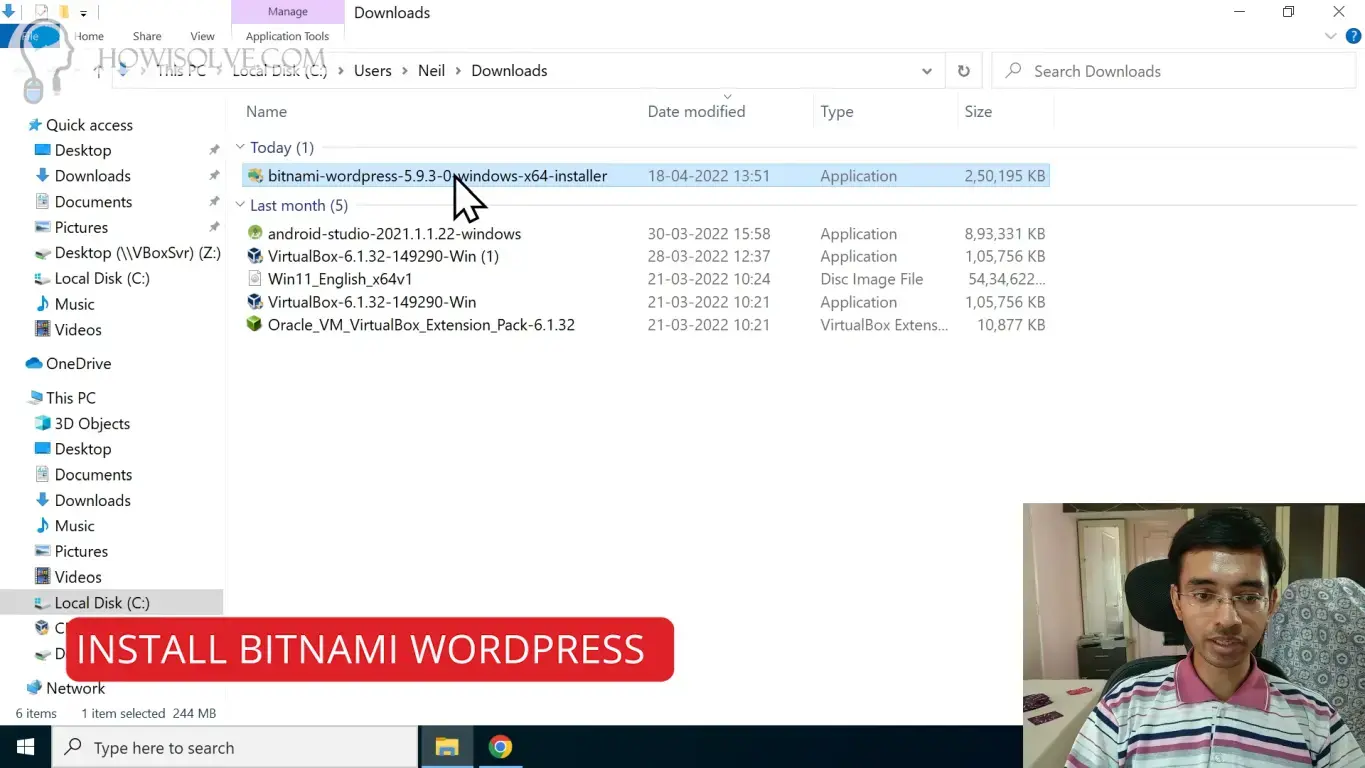
Install Bitnami WordPress
- Double click the downloaded Bitnami WordPress installation exe file to start the setup process.
- Give it administrative privileges by clicking yes on the UAC prompt.
- Select your language and click OK then click Next.
- Keep the default settings unchanged in the components and Installation folder and click on Next.
- On create admin account section type the WordPress author name in your real name field.
- Then type the email address, login, and password details for your WordPress admin account then click Next.
- Now provide the blog name for your local WordPress blog and click Next.
- If you want WordPress to send email alerts, configure SMTP settings to skip it click Next.
- Uncheck Launch WordPress in the cloud with Bitnami and then click Next.
- Click Next to start the installation it will take around 5-10 minutes depending on your computer configuration.
- Add the windows defender firewall exception to run the webserver by clicking on allow access.
- Finally, click on finish and grant it admin privileges by clicking on yes to launch the application.
WordPress Server Manager
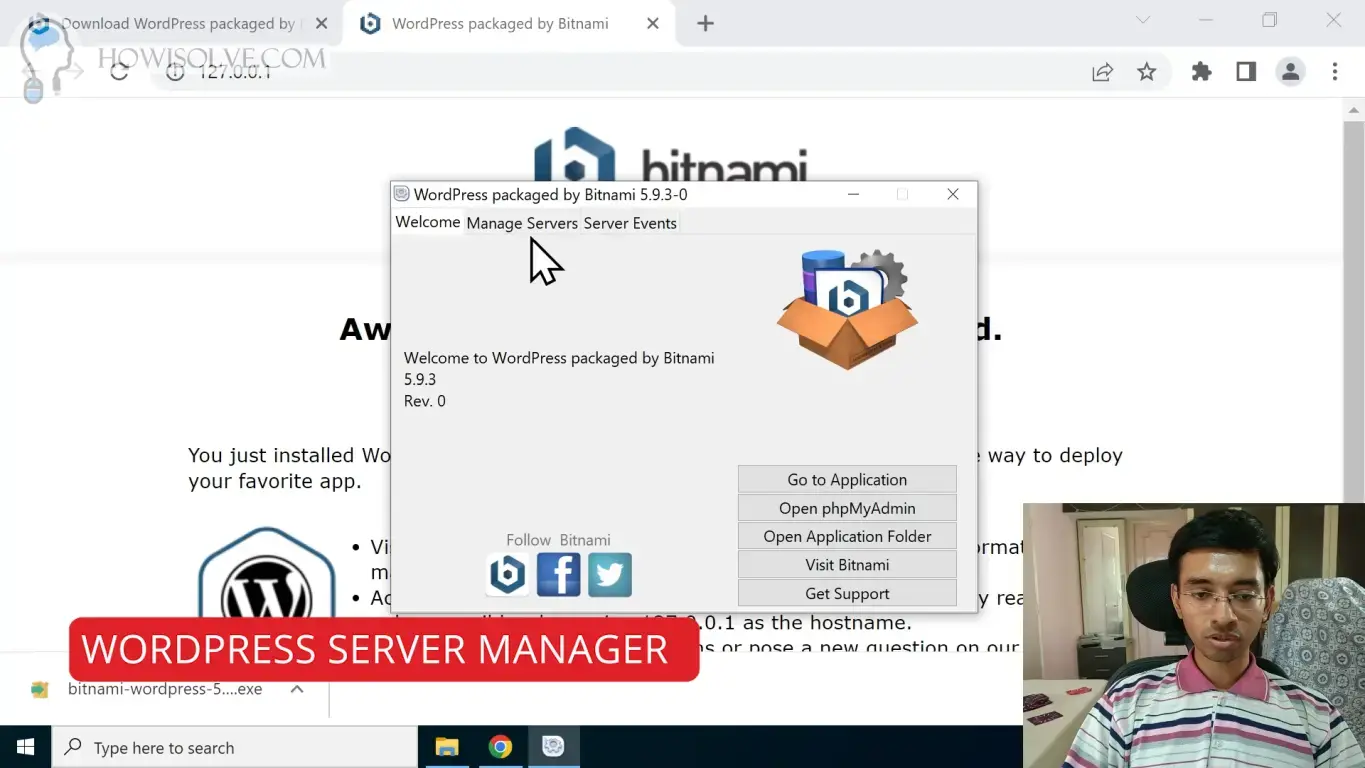
- Click the “Go to Application” button in the welcome tab to open the web server default page which is on 127.0.0.1 or localhost.
- In the welcome tab, you can open the root application folder by clicking on “Open Application Folder”.
- In the Manage Servers tab, you will find the list of servers you should see Apache and MariaDB servers with the status running.
- You can start, stop or restart the server by selecting the server in the list and then clicking the respective buttons on the right side.
- The server events tab keeps a log of the server start and stop events.
Open WordPress Site

- Go to your web browser and in the address bar type 127.0.0.1 or localhost.
- This will open your web server homepage on this page click on the Access WordPress link.
- This will open your WordPress blog page with the address http://127.0.0.1/wordpress/
Add Custom Domain

Instead of typing the IP address 127.0.0.1 or localhost domain. You can change the default domain name for your local WordPress installation.
- Open the folder C:\Windows\System32\drivers\etc in file explorer
- Now open notepad as administrator, type notepad in search, then right-click to select Run as Administrator.
- Select Yes to grant it administrative privileges
- Go in files and click on Open then copy-paste this C:\Windows\System32\drivers\etc folder location in the address bar hit enter
- At the bottom change file type from Text Document (*.txt) to All Files.
- Then select the hosts file and click open.
- In this document go to the last line and hit enter and copy-paste the configuration mentioned below
## Local Site by bitanmi - Start ##
::1 howisolve.in #Local Site
127.0.0.1 howisolve.in #Local Site
::1 www.howisolve.in #Local Site
127.0.0.1 www.howisolve.in #Local Site
## Local Site by bitanmi - End ##
- Change howisolve.in domain name in the above configuration text to any other custom domain that you which you’re local site to run on.
- After making the change save the file by clicking on file>save or using the keyboard shortcut Ctrl+S.
Open WordPress Dashboard
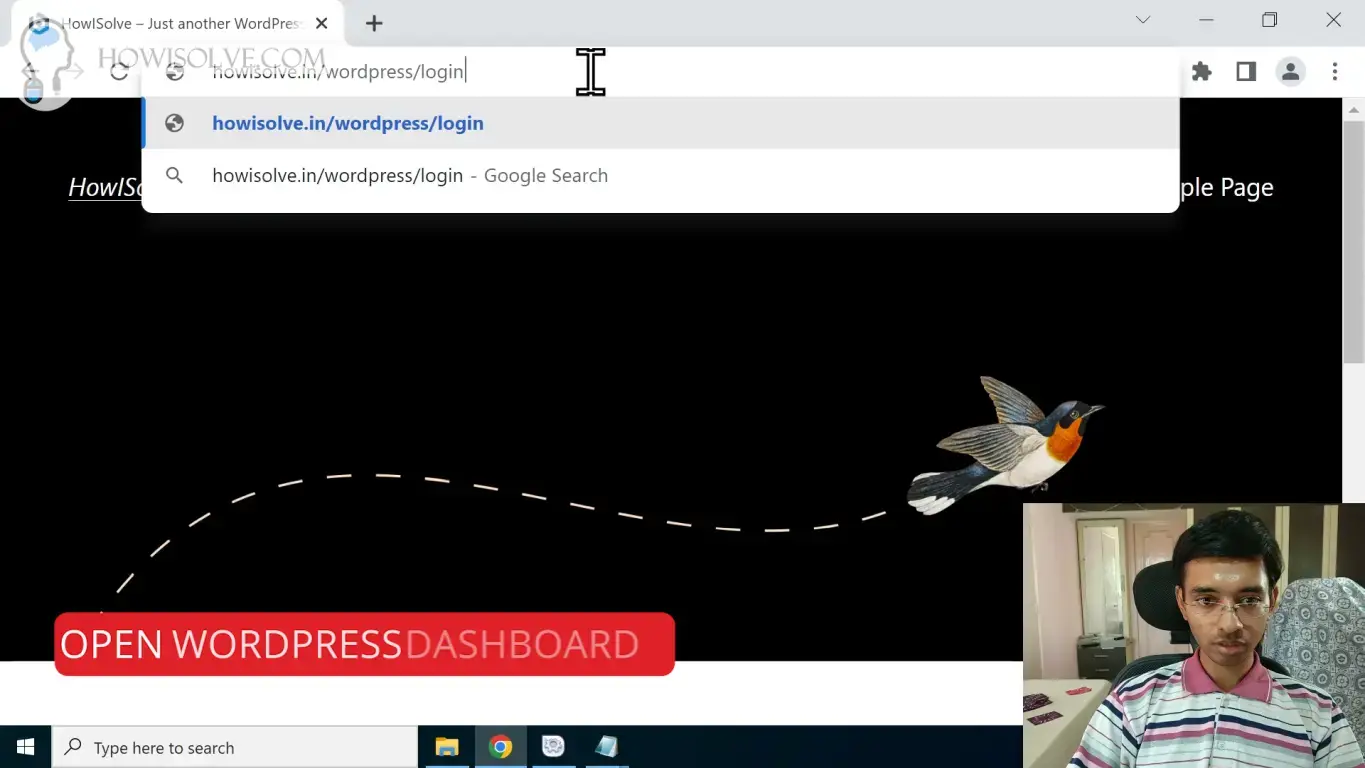
- You can open the WordPress admin login page by typing http://127.0.0.1/wordpress/login in your browser address bar.
- You will be redirected to your WordPress login page.
- Type the username and password that you set during the installation and click on login.
I Hope, friends you liked this detailed step-by-step guide for installing WordPress on your PC / Laptop computer. If you have some questions or are facing some issues. Post them down in the comment section will be glad to help you.
That’s all for today friends Subscribe to our YouTube channel to get more such videos in the future. Subscribe to our newsletters to get email alerts when we release new content. That is it for now friends, see you later bye.