by
by Hi friends, in this video I’ll show you how you can install temporary TWRP on your Android device. This will be a general Android TWRP installation guide. Some steps of this guide will need to be modified based on the device model.

▼Type @ Commands▼
adb devices
adb reboot bootloader
fastboot devices
fastboot boot twrp.img
▼Download @ Links▼
- Platform Tools: https://developer.android.com/studio/releases/platform-tool
- TWRP: https://twrp.me/Devices/
▼Watch @ RelatedVideo▼
- How to Unlock Android Bootloader: https://youtu.be/iRioJBJ9Juc
- How To Install ADB and Fastboot in Windows: https://youtu.be/d2p708bGWTE
- How to Temporary Root Any Android Phone: https://youtu.be/T6Vt2ZN6QFg
▼Scan @ Video Index▼
1. What is Temporary TWRP
By temporary TWRP I mean that you will not be installing it permanently on your Android device. You won’t be able to access it by pressing the recovery key. Basically, we are booting into TWRP from the RAM. And it’s not been installed permanently on the phone storage.
2. Requirements
There are certain prerequisites for this particular guide.
2.1 Unlocked Bootloader
The bootloader of the phone should be completely unlocked. We have got a dedicated guide for unlocking the bootloader. But before you head to that guide please note. Unlocking the Bootloader will erase the entire phone storage. You’ll lose all the app data, contact details, and any data that has not been backed up in the cloud. So if you have got some data on your phone, make sure to back it up before unlocking the bootloader.
2.2 USB Cable
You will also need a good-quality USB data cable to connect the phone to your computer.
2.3 Windows Computer
While it is possible to do this process on a Mac or Linux but this guide only covers the steps for a Windows computer. You will need a windows 10 or windows 11 laptop or desktop. We will send the commands to your phone to boot into TWRP using the computer.
2.4 Install ADB Drivers & Platform Tools
You will have to install ADB drivers as well as platform tools. If you are unaware of the process we have a step-by-step guide on how you can do this. You can check out How To Install ADB and Fastboot in Windows. With all that set aside without wasting much time, let’s get started.
3. Steps
3.1 Enable Developer Options
The first thing you have to do on your phone will be to enable developer options.
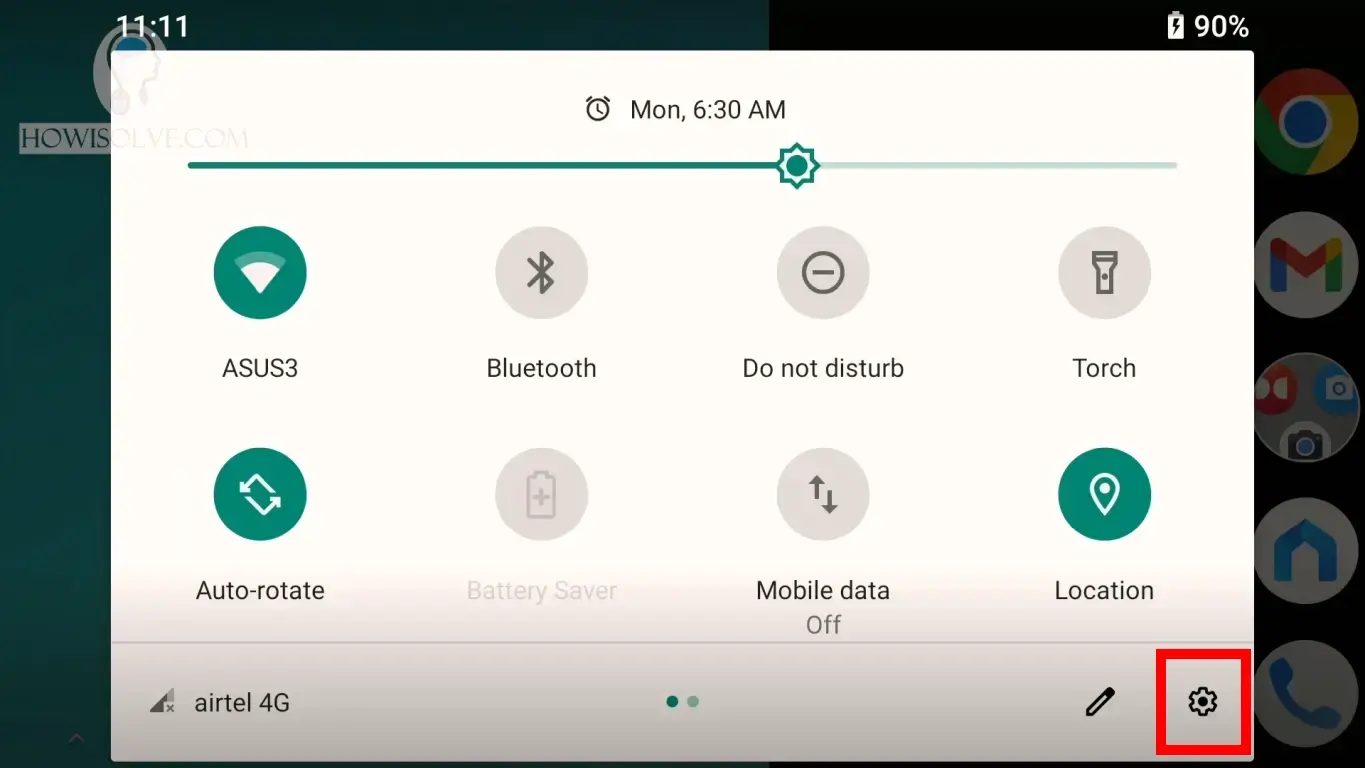
- Swipe down to open the notification panel.
- Click on the spanner icon to open the android settings.
- Scroll down at the bottom you will find the system settings sub section tap on it to open.
- In the system find the about phone section and tap it to open.
- Over here you will find the build number tap on it five times.
- Once you do that developer options will become visible in the system settings.
3.2 Note Down The Phone Model Number
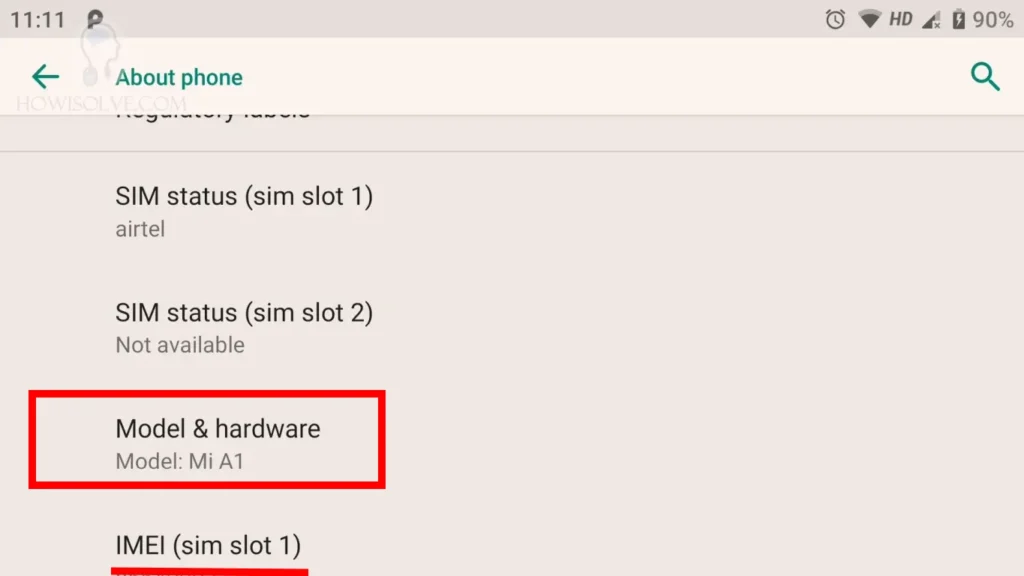
Once you have enabled developer options in the about phone section. Over here you will also find your phone’s model number and hardware. Your model number displayed on this page will be different from the general model name of the phone. As phone releases in different regions are given unique model numbers for each region. Note down this model number as shown over here. We will be using this for downloading the TWRP image. OK, now let’s head to the developer options.
3.3 OEM Unlocking Should Be On
- Go back to the system settings sub-section.
- Scroll to the bottom and tap on the advanced section.
- Over here you’ll see the developer options tap on it to open.
- Over here scroll down and should find the OEM unlocking setting.
- If you have unlocked your bootloader, this option should be shown as enabled.
- If that is not the case then you have to unlock the bootloader as mentioned before you can check our guide.
3.4 Enable USB Debugging
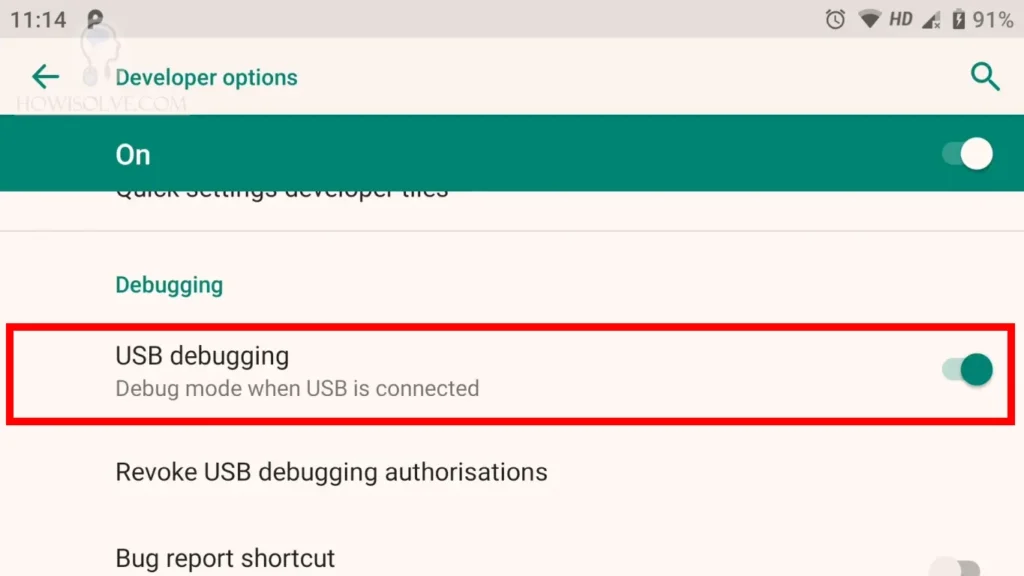
Now let’s enable USB Debugging to do that
- In the Developer Options scroll down and under debugging section, you will find USB debugging.
- Simply tap on USB debugging to enable it.
Once you have enabled USB debugging. Now let’s head back to your computer. We will first download the TWRP image for your particular mobile phone model.
3.5 Download the TWRP image
- On your computer open the web browser and go to the TWRP website.
- In the search bar type your phone model number as noted in the about phone section.
- You will see your phone name and model listed along with the codename.
- Click on it to open the TWRP download page for your phone model.
- Scroll down and you will see the download links.
- Click on a download mirror depending on your location.
- Now you should see a page listing all the different TWRP versions in .zip and .img file format.
- Click on the latest version of TWRP in the .img file format to start the Download.
3.6 Connect Phone Using ADB
The next step is to connect your phone using adb. I am assuming that you have installed ADB and Fastboot drivers and the platform tools. If not you can follow our guide on How To Install ADB and Fastboot in Windows.
- Connect the phone to your computer using the USB data cable.
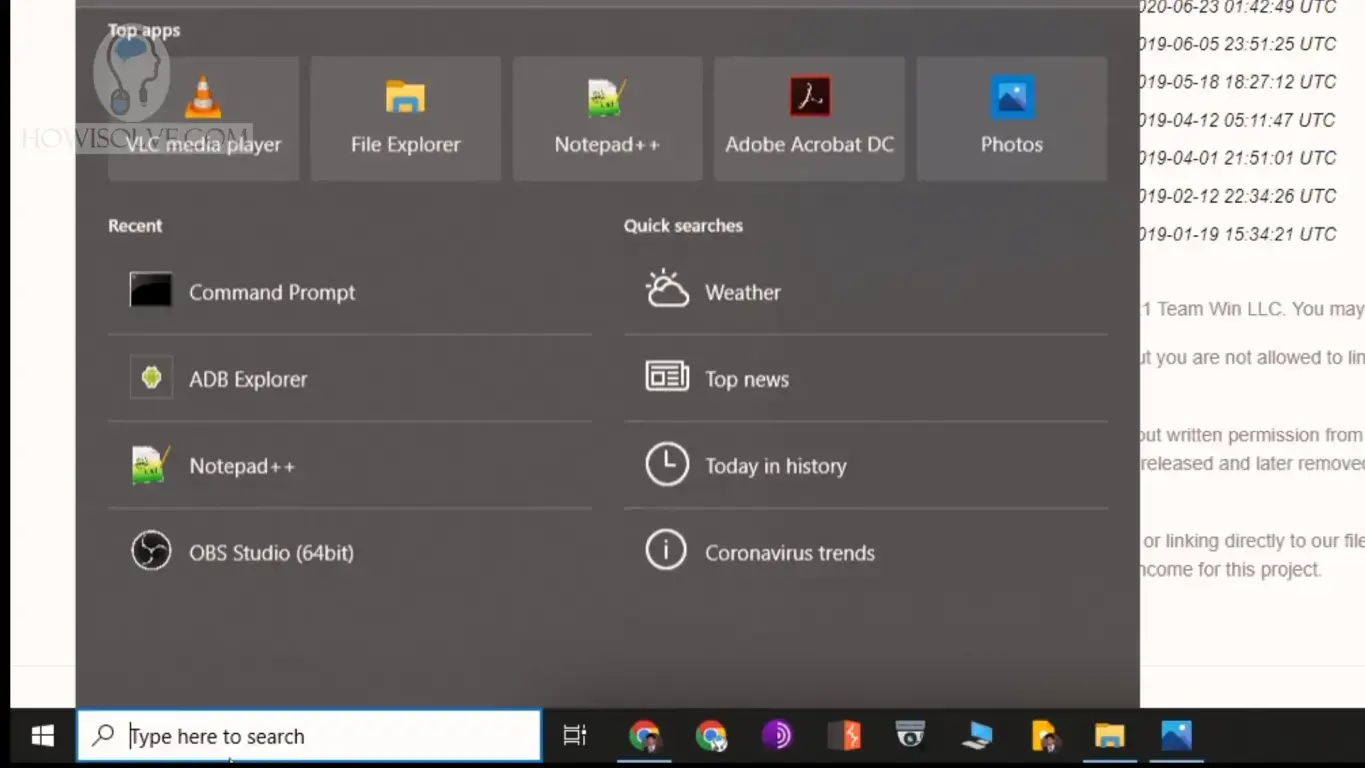
- Open the command prompt by typing CMD in the search box on the taskbar and hit enter.
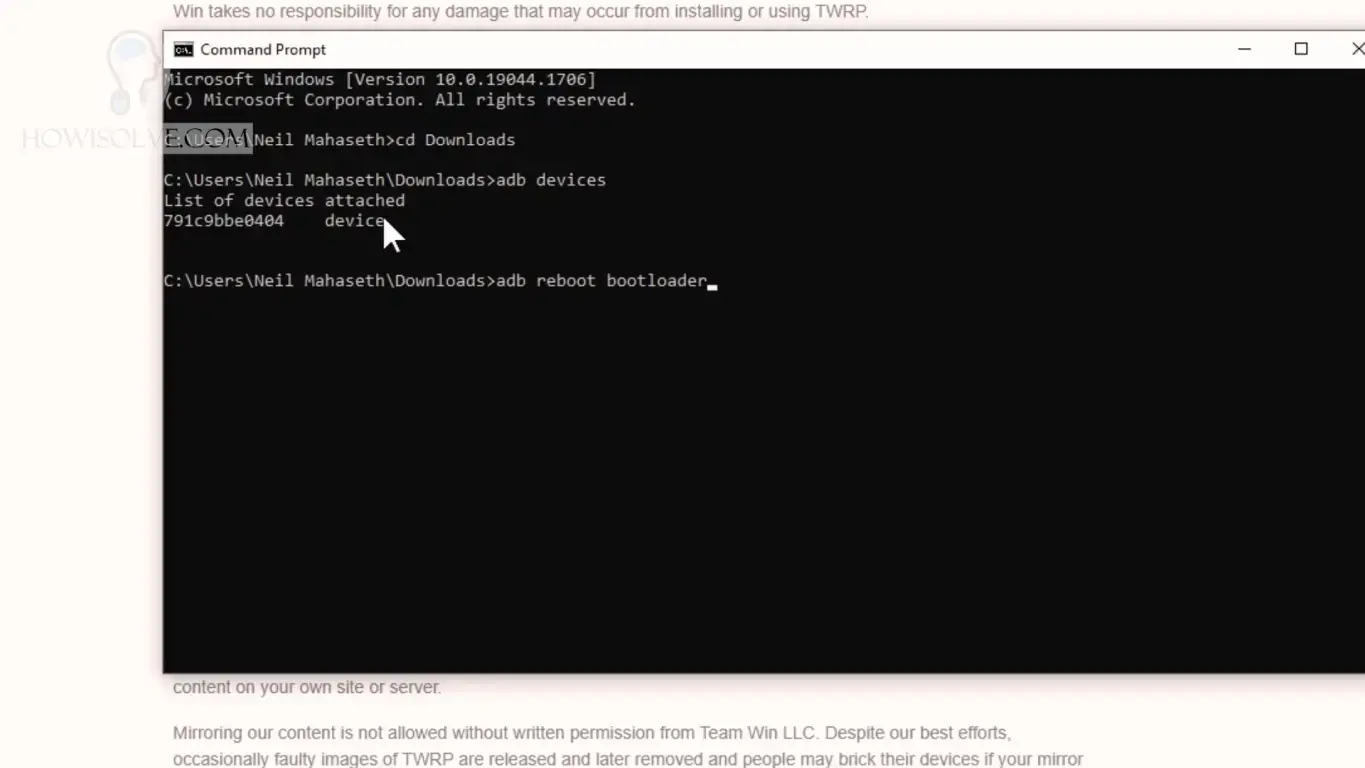
- Now type in CMD cd followed by the download location of TWRP image file and press enter.
- Next type in CMD adb devices and the enter key. If your device has been successfully connected, it will list your mobile phone with its serial number.
- On the first time connecting the device through ADB, you will see a prompt on your mobile asking to grant your computer access. Tap on allow and make sure to tap on the checkbox always allow.
3.7 Put Phone In Fastboot Mode
We’ll now put the phone in Fastboot mode.
- In cmd type, the command adb reboot bootloader and hit enter.
- Your phone will reboot into the Fastboot mode.
- To check whether the fastboot mode has been detected by your computer type the command fastboot devices.
- This will list down your phone serial number if successfully detected in fastboot mode.
If in case your device is not getting detected by your computer in fastboot mode. You either have to reinstall the phone driver or you have to install the Fastboot drivers for your particular phone manually. If you’re unaware of how to do that. There are several guides online, you can search the Internet for how to debug this particular issue. In Fastboot mode, you can boot using an image file. So next we’ll be using the downloaded TWRP img file for booting without flashing. So this will be completely safe it will not break your phone.
3.8 Boot TWRP Image
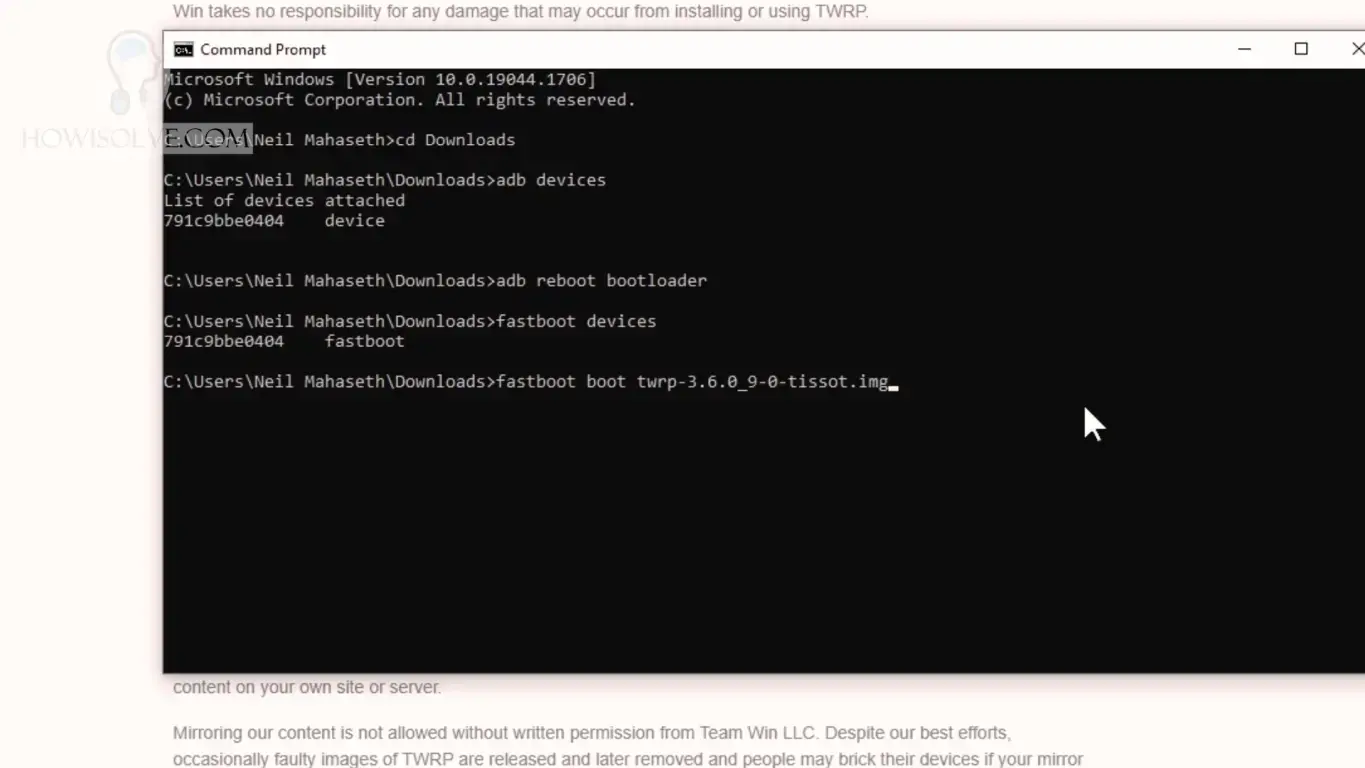
- To boot the TWRP img file.
- Type the command in cmd fastboot boot twrp.img where twrp.img is the file name of the image.
- When you hit enter, this will reboot the phone in TWRP
Since we are in the same folder as the TWRP image. You have to provide the just image name, not the entire path. Once you are in TWRP you can get access to all the TWRP features like flashing custom zip files and taking a backup of your phone even flashing a custom room. That’s how you get TWRP temporary access on an Android device.
I Hope, friends you liked this detailed step-by-step guide to installing TWRP temporarily on your android phone. If you have some questions or are facing some issues. Post them down in the comment section will be glad to help you.
That’s all for today friends Subscribe to our YouTube channel to get more such videos in the future. Subscribe to our newsletters to get email alerts when we release new content. That is it for now friends, see you later bye.